Skip to content

Markup Layers

Overview

Markup layers contain hand-drawn features and text that are stored within the Map. Typically the information is only relevant for a short period of time or forms part of a business process.

For example:

  • Details reported from the field regarding an emergency incident
  • An area of interest when reporting damage to a building or other asset as part of an online reporting web application

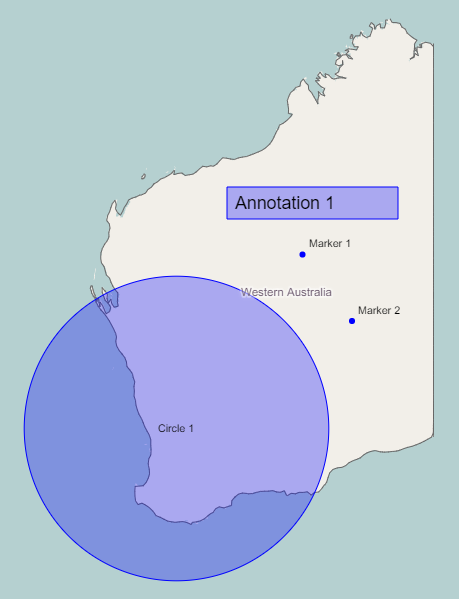
Markup features include lines, polygons, circles, marker points, arrows and annotation text.

Note that markup layers are similar to Layers created from Editable Datsets, with the difference being that markup is stored with the map whilst Editable Datasets store the features in a dataset that may be shared between multiple Maps and/or Layers.

Add Markup

Adding a Markup layer

To add a Markup Layer:

  1. Click Layers in the sidebar
  2. Click Add
  3. Click Markup Layer

Add Markup Layer

Adding a Markup Feature
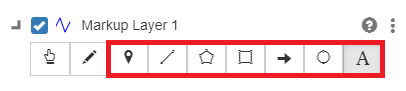
Add Markup

Feature typeDescription
Create Marker
  1. Click to place a marker pin
Create Line
  1. Click to create a start point
  2. Click or press Space to add additional vertices
  3. Press Delete to remove the last vertex
  4. Double-click or press Enter to place the final vertex
Create Polygon
  1. Click to create a start point
  2. Click or press Space to add additional vertices
  3. Press Delete to remove the last vertex or Escape to cancel
  4. Double-click or press Enter to place the final vertex
Create Rectangle
  1. Click to place the first corner
  2. Move the mouse to size the rectangle
  3. Click or press Space / Enter to place the opposing corner and end drawing
Create Arrow
  1. Click to place tail of the arrow
  2. Click or press Space to place head of the arrow
  3. Move the mouse across the length of the line to adjust thickness of arrow shape
  4. Click or press Space / Enter to end drawing
Create Circle
  1. Click to create the center point for the circle
  2. Move the mouse to adjust the size
  3. Click or press Space / Enter to end drawing
Add annotation text
  1. Click to place a corner for the annotation border
  2. Move the mouse to size the border rectangle
  3. Click or press Space / Enter to place opposing corner and end drawing
  4. Enter annotation text in the sidebar along with adjusting text size and alignment

At any point while drawing a markup shape, you can press the Escape key to cancel the drawing.

Note: Styling is applied to each markup layer and not per feature.

Editing a Markup Feature
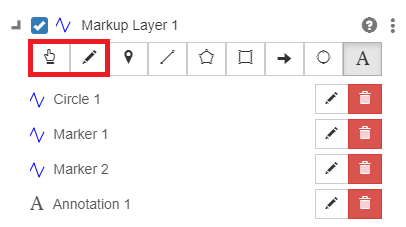
Edit Markup

Edit typeDescription
Move tool
  1. Click on a markup feature and drag to move the entire feature
  2. Click or press Space / Enter to confirm the new placement
Edit tool
  1. Click on a markup feature
  2. Click on a vertex to select it. New vertices can also be created in this way
  3. Move the mouse to relocate the vertex
  4. Click or press Space to confirm the new position
  5. Edit the Title or Description in the edit tool panel
  6. Click OK to confirm the details or Delete to delete the markup feature

Edit Markup